photography-tips
Best Indoor Wedding Photography Lighting: Professional Techniques for Intimate Venues
April 4, 2026
12 min read
0 views
Loading community blog...
Indoor wedding photography lighting is one of the most challenging and rewarding aspects of modern wedding photography. Whether you're shooting in a dimly lit ballroom, an intimate chapel, or a rustic barn reception, mastering indoor wedding photography lighting techniques will elevate your work and ensure you deliver stunning images in any venue. This comprehensive guide covers the essential strategies, equipment, and techniques professional wedding photographers use to create beautiful images in low-light indoor environments.
Before diving into solutions, it's important to understand why indoor wedding photography lighting presents unique challenges. Unlike outdoor photography where you have abundant natural light, indoor venues often feature mixed color temperatures, uneven lighting, and low light levels that can compromise image quality. Tungsten lighting fixtures, LED uplighting, and fluorescent ceiling lights create color casts that require careful white balance management and strategic lighting solutions.
The key to successful indoor wedding photography lighting is developing a flexible approach that combines multiple techniques. Professional wedding photographers don't rely on a single solution — instead, they assess each venue and adapt their lighting strategy accordingly. Understanding how to maximize natural light, effectively use flash, and strategically position continuous lighting will give you the technical foundation needed to excel in any indoor wedding scenario.
Off-camera flash is the cornerstone of professional indoor wedding photography lighting. Unlike on-camera flash, which creates harsh shadows and unflattering light, off-camera flash allows you to position light sources strategically to sculpt subjects and create dimensional, professional-looking images.
The golden rule of indoor wedding flash photography is positioning your flash at a 45-degree angle to your subject. This creates flattering light that sculpts faces, defines features, and avoids the washed-out appearance of direct frontal lighting. For ceremony photography, position your off-camera flash to the side of the aisle, approximately 8-12 feet from the couple. This distance ensures the light spreads evenly across your subjects while maintaining control over the falloff.
For reception photography, adjust your flash position based on the room's layout. In narrow venues, position flash closer to the action; in larger ballrooms, you may need to increase power or use multiple flash units. Always position your flash slightly higher than your subjects' eye level — this creates more flattering light that doesn't cast shadows directly behind them.
Proper exposure is critical in low light wedding flash photography. Start with your camera's flash sync speed (typically 1/200th of a second) and set your aperture to f/2.8 or f/4 depending on your lens and desired depth of field. Use manual flash mode rather than TTL (through-the-lens) metering, which can be unpredictable in dynamic wedding environments. Begin at 1/2 or 1/4 power and adjust based on your distance from subjects and ambient light conditions.
In dimly lit venues, increase your ISO to 1600-3200 to balance ambient light with your flash exposure. This technique, often called "dragging the shutter," allows you to preserve the venue's atmosphere while ensuring properly exposed subjects. The result is images that feel natural and integrated within the environment rather than obviously lit.
Never use bare flash for indoor wedding photography — the harsh, directional light is unflattering and unprofessional. Instead, invest in quality flash modifiers that soften and diffuse light. A 24-inch shoot-through umbrella is an excellent all-purpose modifier that's portable and effective. For more controlled light, a 43-inch octabox creates beautiful, dimensional light with excellent falloff characteristics.
Diffusion panels and bounce cards are invaluable for fine-tuning your light. A simple white foam core board positioned above your off-camera flash creates a subtle fill light that reduces harsh shadows. For ceremonies and formal moments, a larger diffusion panel (48x48 inches) positioned between your flash and subjects creates soft, flattering light that looks natural and elegant.
Even in indoor venues, natural light often plays a crucial role in wedding photography lighting. Windows, glass doors, and skylights provide opportunities to supplement or replace artificial lighting. Successful natural light wedding photography requires understanding how to position subjects, manage exposure, and balance ambient light with supplemental flash.
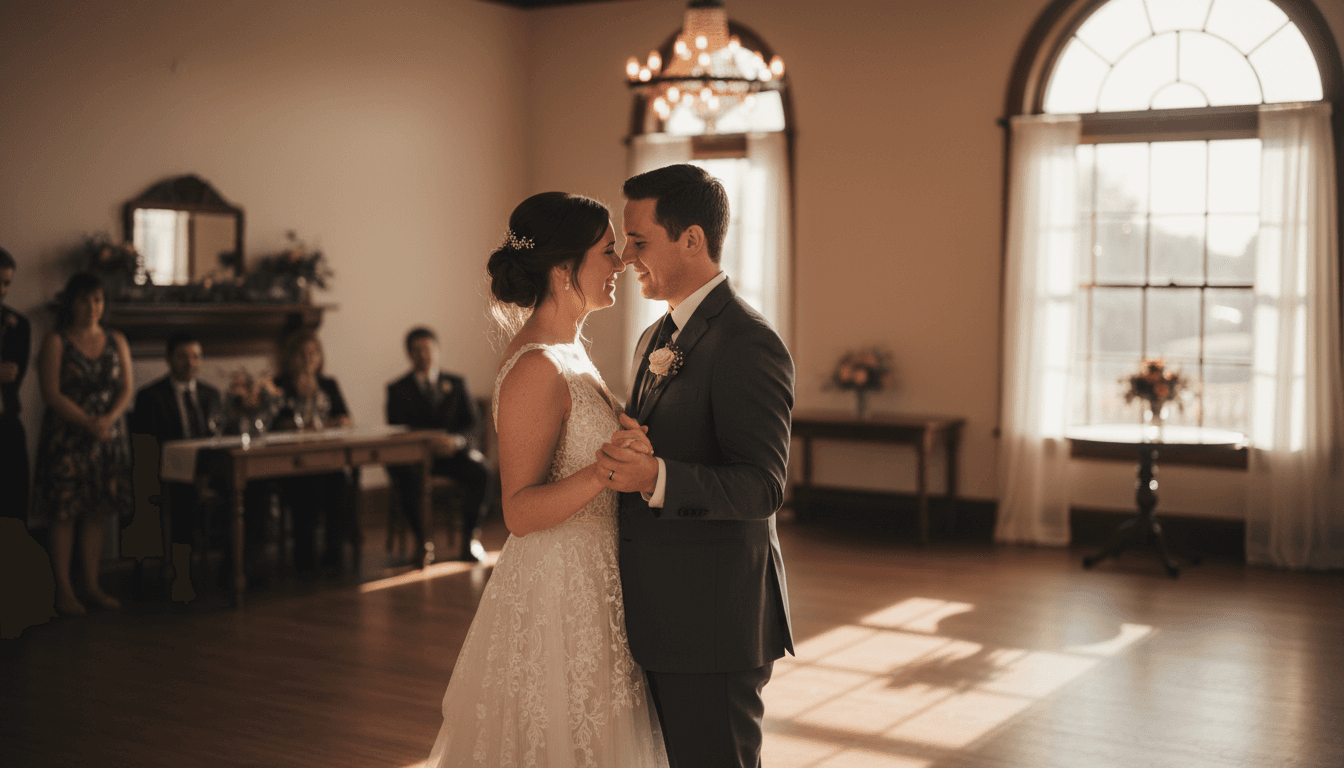
When natural light is available, position your subjects to take full advantage of it. Side-lighting from windows creates dimensional, flattering light that's ideal for bride and groom portraits. Position your couple with the window to their side, creating a gentle rim light that separates them from the background. This technique, called "window light photography," produces images with a soft, romantic quality that's difficult to replicate with artificial lighting alone.
For ceremony photography in venues with large windows, position yourself to capture light streaming through the glass. This creates a magical, ethereal quality to your images. Use your off-camera flash as a subtle fill light to balance the bright window light and ensure proper exposure of faces and details.
Natural light from windows is often bright and directional, creating high contrast that challenges your camera's metering system. Use spot metering mode to meter directly off your subjects' faces, ensuring proper exposure for the most important elements. In high-contrast situations, use exposure compensation (typically -0.5 to -1.5 stops) to prevent blown-out highlights while maintaining subject detail.
Reflectors are essential tools for managing natural light in indoor venues. A large white or silver reflector positioned opposite a window creates subtle fill light that softens shadows and creates more flattering portraits. For bride and groom portraits, have an assistant hold a 5-in-1 reflector to bounce window light back onto faces, reducing unflattering shadows.
While flash is the primary tool for most wedding photographers, continuous lighting offers unique advantages for specific situations. LED panels, tungsten lights, and HMI fixtures provide constant, adjustable light that simplifies exposure management and allows you to see your lighting setup in real-time.
Modern LED panels are lightweight, efficient, and offer excellent color rendering. Bi-color panels (3200K to 5600K) allow you to match any venue's color temperature, eliminating color casts and simplifying white balance. Position LED panels as key lights for detail shots, getting-ready photography, and intimate moments where flash might feel too intrusive.
LED panels excel for low light wedding photography in venues where flash would be disruptive, such as during vows or quiet ceremony moments. Position panels off-camera at a 45-degree angle to create flattering, dimensional light. The constant light output means you can monitor exposure precisely and adjust positioning in real-time.
Advanced indoor wedding photography lighting often combines flash and continuous light sources. Use continuous LED panels as fill light while flash provides the main light source. This hybrid approach gives you maximum control over the final image while maintaining the dynamic, powerful quality that flash provides. For reception dancing and fast-moving moments, this combination ensures properly exposed images even in challenging lighting conditions.
Professional indoor wedding photography lighting requires investment in quality equipment. Here's the essential kit every wedding photographer should own:
Proper camera settings are fundamental to successful indoor wedding photography lighting. These recommended settings provide a solid starting point that you can adjust based on specific venue conditions:
Different venues present different challenges. Here's how to approach the most common indoor wedding photography lighting situations:
Ballrooms often feature low ambient light with colored uplighting that creates challenging color casts. Solution: Use manual flash with high ISO (2000-3200) to balance ambient light and flash. Set your white balance to the warmest color temperature in the room and adjust in post-processing. Position off-camera flash to the side to create dimensional light that separates subjects from the colored background.
Chapels typically have limited flash access and require subtle, non-intrusive lighting. Solution: Use continuous LED panels or a single off-camera flash positioned discreetly to one side. Maximize natural light from windows and candles. Increase ISO and use wider apertures to gather available light while maintaining sharp focus.
These venues often feature mixed lighting with warm tungsten fixtures and variable natural light. Solution: Use custom white balance to manage color casts. Position off-camera flash to complement existing lighting rather than overpower it. Use lower flash power (1/8 to 1/4) to maintain the venue's character while ensuring proper subject exposure.
Proper post-processing is essential for delivering professional indoor wedding images. After capturing images with correct indoor wedding photography lighting techniques, your post-processing workflow should include:
Consider developing custom presets for common indoor venues (ballrooms, chapels, barns) that address typical color casts and lighting challenges. This streamlines your workflow and ensures consistency across your wedding photography portfolio.
For large venues or particularly challenging lighting conditions, multi-flash setups provide superior control and coverage. Position your main flash at 45 degrees for key light, a second flash as fill light opposite the main light, and potentially a third flash for background separation or accent lighting.
Multi-flash setups require careful power management and metering. Start with your main flash at 1/2 power, fill flash at 1/4 power, and background flash at 1/8 power. Adjust based on results and venue conditions. This approach requires additional equipment and setup time but delivers professional, gallery-quality results even in the most challenging indoor venues.
The best flash for indoor wedding photography is a powerful, reliable unit with fast recycle times and consistent triggering. Professional-grade flashes like the Godox SL-60W, Canon EL-1, or Nikon SB-5000 offer the power and reliability needed for wedding work. Prioritize flashes with high guide numbers (100+), fast recycle times (under 3 seconds), and compatible wireless triggering systems. Your flash should sync with your camera at 1/200th second or faster and support manual power control for consistent results.
Manual flash mode is strongly recommended for indoor wedding photography. TTL (through-the-lens) metering can be unpredictable in dynamic wedding environments with varied subjects, backgrounds, and lighting conditions. Manual mode gives you consistent, repeatable results that you can adjust based on distance and venue conditions. Start at 1/2 or 1/4 power and adjust in 1/3 stop increments based on your results. This approach ensures proper exposure and professional-quality images throughout your wedding day.
Color casts from venue lighting are managed through three strategies: white balance correction, custom white balance settings, and post-processing adjustment. During your shoot, use Kelvin mode to set a custom white balance that matches the dominant color temperature in the venue. In post-processing, use the white balance slider in Lightroom or your editing software to fine-tune colors. For challenging mixed-lighting situations, shoot in RAW format, which provides maximum flexibility for white balance correction. Consider developing custom presets for frequently-used venues to streamline your workflow.
For indoor wedding photography with flash, use apertures between f/2.8 and f/4. This aperture range balances proper flash exposure with adequate depth of field for group shots and detail photography. Wider apertures (f/1.4-f/2.0) gather more ambient light but reduce depth of field, making focus critical in fast-moving wedding situations. Narrower apertures (f/5.6+) provide greater depth of field but require higher flash power and increased ISO. The f/2.8-f/4 range represents the optimal balance for versatile, professional wedding photography in indoor venues.
Indoor wedding photography lighting mastery is achievable through understanding fundamental lighting principles, investing in quality equipment, and developing a flexible approach that adapts to each unique venue. Whether you're using off-camera flash, maximizing natural light, or incorporating continuous LED panels, the techniques outlined in this guide provide a comprehensive framework for creating stunning images in any indoor wedding environment.
The key to success is practice and continuous refinement. Start with the fundamental techniques — proper off-camera flash positioning, aperture and ISO management, and white balance control — and gradually incorporate advanced strategies like multi-flash setups and continuous lighting as your skills develop. Remember that every venue presents different challenges, and flexibility is essential.
Ready to elevate your indoor wedding photography?Explore our complete wedding photography equipment guideto ensure you have the right tools for success. For more advanced techniques,check out our advanced flash photography guideand discover how professional wedding photographers create stunning images in the most challenging lighting conditions.
Don't let indoor venues intimidate you. With proper lighting techniques, quality equipment, and a professional approach to exposure management, you'll deliver beautiful, professional-quality images that your clients will treasure. Start implementing these indoor wedding photography lighting techniques at your next event and watch your work transform.
Enjoyed this article? Share it.
Get the latest wedding tips, inspiration, and planning guides delivered to your inbox.